
Why claim documentation matters
A property insurance claim is built on evidence. The insurer needs to understand what was damaged, when and how it happened, and what it will cost to fix. Good documentation makes that easier to show and harder to dispute. It can also help if questions come up later about the date of loss, pre-existing damage, or items missing from the estimate.
The challenge is timing. Evidence fades quickly: hail marks get rained on, water dries, debris is hauled away, and emergency repairs cover what was there. This claim documentation checklist is designed to help you capture the important details while they are still visible.
Photo and video tips
- Start before cleanup. Photograph damage before moving anything, then again after emergency mitigation.
- Go wide, then close. Take a wide shot that shows where you are, a medium shot of the damaged area, and close-ups of specific damage.
- Show scale. Place a coin, ruler, or tape measure next to hail stones, dents, or cracks.
- Record all sides. Walk around the entire building and capture each elevation, including fences, outbuildings, vehicles, and HVAC units.
- Use video for context. A slow walkthrough with narration (date, location, what you are seeing) can tie individual photos together.
- Keep the originals. Do not edit or crop the original files; the embedded date and time can be useful.
- Stay safe. Do not climb onto a damaged or wet roof. Photograph from the ground or let a professional inspect it.
For hail specifically, see how to document hail damage for an insurance claim. Business owners should also read how to document commercial property damage after a storm, which covers equipment, inventory, and business income records.
Organizing your claim file
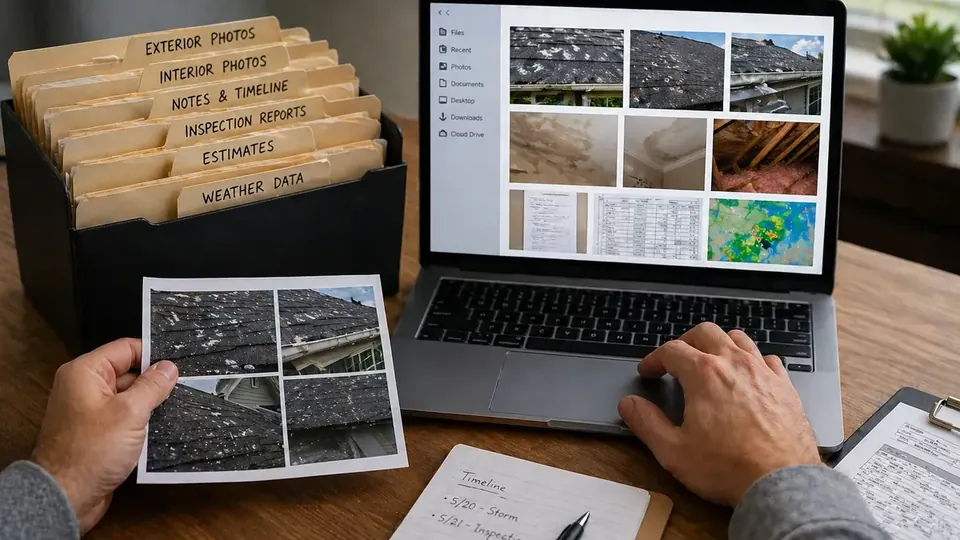
Keep everything in one place, either a physical folder or a cloud folder you can reach from your phone. A simple structure works well:
- Policy: your full policy, declarations page, and any endorsements.
- Claim basics: claim number, date of loss, adjuster names and contact information.
- Photos and video: organized by date and area of the property.
- Weather evidence: storm reports for your date of loss. The storm lookup tool can help you find NOAA and National Weather Service reports near your city or ZIP code.
- Estimates and invoices: contractor estimates, the insurer's estimate, mitigation invoices, and receipts.
- Contents list: damaged personal property or business contents with descriptions, ages, and costs where known.
- Correspondence: letters, emails, and your communication log.
Keeping a communication log
Every conversation about your claim is part of the record. For each call, email, or visit, write down the date and time, who you spoke with, their role, what was discussed, and any next steps or deadlines. Follow up important phone calls with a short email summarizing what was said. A clear log helps you keep track of requests and can be useful if the claim is delayed or disputed.
Your privacy
The checklist above runs entirely in your browser. Your checkmarks and notes are not sent to us or anyone else. If you choose "Save my progress on this device," they are stored only in this browser's local storage, so they will not appear on another device and will be lost if you clear your browser data. Use the print or download buttons to keep a copy.
If you would like a professional to review your documentation and claim, request a Free Claim Review.
Frequently Asked Questions
Is my checklist information sent to anyone?
No. Your checkmarks and notes stay in your browser. If you turn on "Save my progress," they are stored only in this browser's local storage until you reset or clear it. Nothing is sent to us.
Should I wait to make repairs until the adjuster inspects?
Take reasonable steps to prevent further damage right away, such as tarping a roof or stopping a leak, and keep receipts. Hold off on permanent repairs until the damage is documented and you have discussed it with your insurer, unless waiting would be unsafe. Photograph everything before and after any emergency work.
How many photos should I take?
More than you think you need. Take wide shots that show where the damage is, medium shots of each area, and close-ups of specific damage. Photos are free to take and hard to recreate after cleanup or repairs.
What if I already threw away damaged items?
Write down what was discarded, when, and why, and gather any photos, receipts, bank or card statements, or product listings that show what the items were. Tell your insurer. Going forward, keep damaged items until the insurer says they can be discarded, when it is safe to do so.